1 Peter 3:8-12
Finally, all of you, be like-minded, be sympathetic, love one another, be compassionate and humble. Do not repay evil with evil or insult with insult. On the contrary, repay evil with blessing, because to this you were called so that you may inherit a blessing. For, "Whoever among you would love life and see good days must keep your tongue from evil and our lips from deceitful speech. Turn from evil and do good; seek peace and pursue it. For the eyes of the Lord are on the righteous and his ears are attentive to their prayer, but the face of the Lord is against those who do evil."
I have been reading through The One Year Mother Daughter Devo by Dana Gresh with Janet Mylin with Z. Today's Devotion was "God's Definition of Harmony" and the scripture noted was 1 Peter 3:8-12. The devo pointed out how this isn't the world's viewpoint of Harmony, but God's. That harmony only comes from having the same mind, one for truth, one centered on Christ. All important to share with my daughter.
However, this verse has been my prayer for my family for the last few year; that we be unified in Christ, and therefore seeking His way, not our own, that we be for one another and not against each other, that we live in a way that we show each other Christ's unconditional love as a natural extension of our actions towards one another.
I have poured over these verses in prayer, lifting up my family members by name. Calling out to God for His guidance, direction and ultimately restoration to being like-minded with Him. Frequently I find myself as a stay-at-home-schooling mom feeling frustration, that the sibling rivalries would go away if we could just live this passage. That thoughtfulness for one another would naturally flow from my children if they could just embrace these verses. That my job as a mom would be so much easier...
When I am disappointed /angry/frustrated/sad due to the expectations I place on my husband, I find myself once again silently praying to God, that Rocky become like-minded, and see things how I'm sure Christ must see them. I end with praying that he can see my point of view...
And don't get me started on my Christian friends, my extended family. There are so many times when I am offended by a comment or action and get worked up because I don't think they treated or spoke to me in a way that was Christ like...
Of course, when it comes down to really studying this text, I find I am the one who isn't living like-minded with Christ. I get frustrated with what I think my ______ should be doing, and instead of responding in harmonious love, I react with ungodly word or deed, or find myself withdrawing from the relationship, thinking thoughts, feeling empty, disconnected, and broken.
I don't start with viewing _____ with Christ eyes of love and rejecting the sin alone. I find fault with His precious child. I've missed the mark. I've repaid evil with evil and insult with insult.
His word says to repay evil with blessing.
What does that look like? I'm not certain, other than I haven't been doing it.
I will continue to pray this verse over my family, but even more so pray it over myself. I want to have Christ's mindset towards my family and be sympathetic towards their situation and feelings, not just mine. I want to show them His unconditional love and be compassionate and humble toward them. I want to repay evil and insult with blessing because it's my inheritance as a child of God. I want to keep my tongue from evil and lips from deceitful speech. I want to turn from evil and do good; to seek peace and pursue it. I want my Father's eyes on me and His ears attentive to my prayers.
Sunday, July 31, 2016
Wednesday, July 27, 2016
Sing to the LORD a new song
Psalms 96:1
Oh sing to the LORD a new song; sing to the LORD, all the earth!
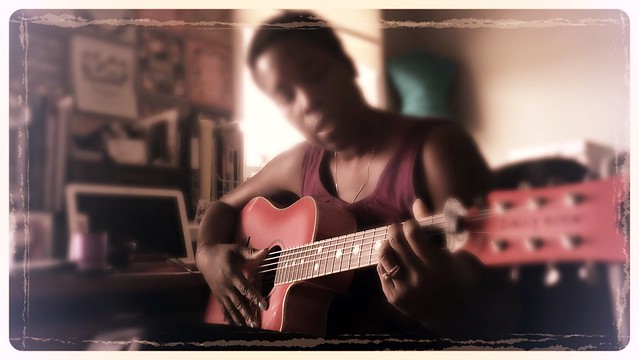
I love to sing. I love worshiping. I feel that God gave me a voice and love for music to lift him up in praise. I have been a singer since I was very little. My first memories of singing in a talent show was when I was 7. I sang the Rainbow Connection dressed as Kermit the Frog.
Growing up, I had many more talent shows to participate in, and when I returned home from college, I was asked to serve in my church as a worship leader. It didn't happen at first, but singing praise songs took on a whole new light. God showed me that I was singing to Him, and not to an audience. My "performance" transformed to "worship".
Sometime in my college days I purchased a classical guitar. I took a few lessons, and tried to learn how to play, but I had chosen the wrong guitar for me, so I wasn't very successful.
Flash forward a little over 20 years. I now have a different Guitar, two actually, that I am regularly practicing, and learning on again.
I love to sing and play worship and praise songs. They bring forth an emotional connection with God that stirs so deep within. They allow me to pour out to God admiration and praise for who he is, and bask in who I am in Him. They encourage me to celebrate the creativity and uniqueness he created within me. They solidify my identity.
It's taken me much of my life to "find myself". I now know it's not important who I am, but whose I am.
Tuesday, July 26, 2016
Bible Art Journaling, my new worship!
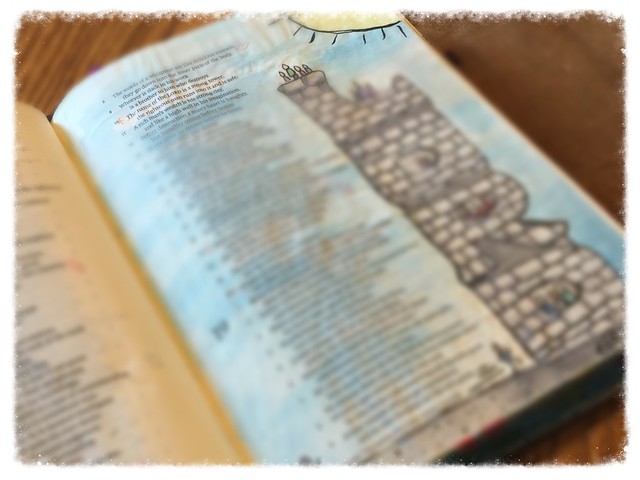
Hebrews 4:12 For the word of God is living and active, sharper than any two-edge sword, piercing to the division of soul and spirit, of joints and of marrow, and discerning the thoughts and intentions of the heart.
A month or so before I wrote my last post I purchased an ESV Single Column Journaling Bible from Crossway. I had seen the bible years before and it stood out to me, but I wasn't in need of a bible then. I didn't need one in the fall of 2014, either, but I bought one. I was starting a journey that has brought me to where I am today, and since the journey was spiritual and relational between God and me, a new bible seemed the appropriate way to start. A clean slate. A fresh approach. I started participating in She Reads Truth studies and found that I was reading and ingesting the bible in a whole new way. I had a hunger that I had never felt before. The more I read, the more I wanted to read, and the more the bible changed from being a book to a living person, a best friend.
Wednesday, October 22, 2014
Has it really almost been two years? It doesn't seem like that long. We spent the first 9 months of 2013 selling our home, then the purchase of our new home met unexpected obstacles so we lived in JayJay, our Travel Trailer for 4 months in my parents driveway. Finally, things worked out and we finalized our movers a small town east of Charlotte in January.
Last year's theme was transition. This year's theme has been settling in. Physically settling into our new space. Everything about our new home is more spacious. The yard, the house, the rooms within. The only area that had deficit was our outdoor storage because the shed is about half what we had before. I'm glad I had been decluttering, but we still ended up moving quite a bit of stuff that needed to go. I decided once I identified this, that I didn't want these things to even come into our new house. We craigslisted a bit, but most we donated, or gave away. What was left fit nicely into our new home in about 2weeks. I had a lot of help, and was motivated to get the boxes gone. After a year of "moving" I was ready to be settled.
Then came settling into our routines, new pets, Rocky's new job, new town, new county, new friends, new co-op for homeschool, new church. Everything has changed externally in our lives in less than 6 months, though we only moved about 30 minutes from where we lived before.
We were blessed after 9 months of searching to find the home has all of our needs and many of our wants. It is both in the country and "in town" with sidewalks and in walking distance of the park, and the post office. If I had known that this was what I needed (which, I didn't until close to the end of our search), I still could not have picked out this property. We definitely feel that it is a blessing from God that we have this home.
I want to record these times as we start a new adventure, they are blessings and should be shared.
Wednesday, January 09, 2013
Drink your fruits and veggies!
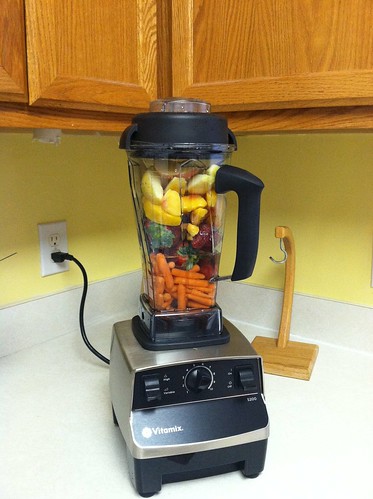
This year's Christmas gift money from my parents, inlaws and Rocky went to buy a Vitamix 5200!
I have wanted to be able to make my own smoothies for some time. I love teh smoothie! I have a nice blender jar that we bought to go on my Bosch Kitchen Machine, but when I tried to make smoothies, they had texture, and I'm not talking about the kind of texture you want to have. Little bits of spinach and kale in my berry smoothie was unappealing and nearly made me gag.
I believe that I'm going to love this blender and it's going to become one of my favorite kitchen appliances. It's so powerful! It has a variety of uses and replaces several single use kitchen tools. It also has an amazing cookbook chock full of recipes to make all kinds of whole foods from scratch.
One of the realizations I have been coming to since the summer is that I have gotten lazy in the kitchen. I have been using too many processed foods. I allowed busy to equate to the wrong type of shortcuts. It's unhealthy for all of us, and who knows the consequences both short and long term.
I want to be more contentious about what we eat. I want my children to have a healthy amount of veggies in their diet, and not just thebrooked variety. I have to start with what I allow to come into the house and what I am prepared to fix. I don't think this will turn into me becoming fanatical or anything, but I want to be deliberate. I see the Vitamix as an enabling tool to help. :)
Today's smoothie was organic carrots, frozen whole organic strawberries including the greens, frozen peaches, fresh apples, a small piece of ginger root, and once I had poured off mine, banana for the kids portion. It was what I had on hand and a hit, though the kids wouldn't have been interested in raw carrots otherwise.
Thursday, November 01, 2012
Fiber time
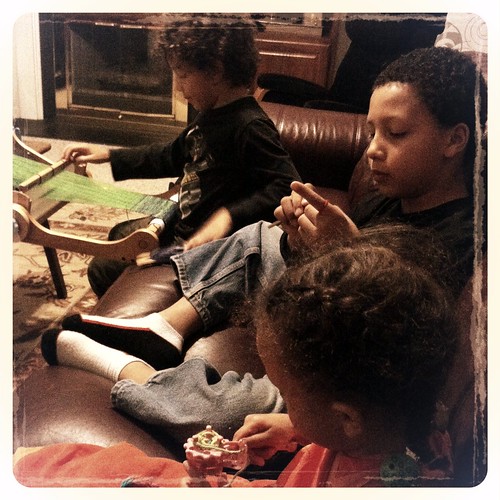
The kids have been exposed to my fiberantics since they were born. In the early days Charmie's and then later Mardie's play room was also my craft room at both of our homes. As I tried to make things for them and our home, I would craft around the kids. They have seen me sew, embroider, quilt, crochet, knit, spin, weave, card fiber, and more. Yet I really wasn't engaging them in the process. Fiber was my stress relief. It was my escape. It was just for ME.
I think I was afraid. Afraid of them hurting themselves on sharp tools. Afraid of them damaging expensive tools or materials. Afraid of them making my efforts take longer or setting me back. Afraid of failing to teach them well. I was afraid of sharing. In general I was consumed with fear.
Fear isn't a good thing. It's a paralyzing thing. It's a thief. It takes something that should be good and lessens or destroys it.
Starting with Mardie a few weeks ago, the kids have been interested in learning fiber arts. Actually, it goes back farther than that, but a few weeks ago I started to listen, and not be so afraid.
I mean, I'm right there, I'm not going to intentionally let them get hurt. I'm teaching them all kinds of other things, why not teach them my passion. And the tools and materials are just that, tools and materials. If they are broken or damaged, they can be replaced. I can't replace teachable moments passed by. I can't replace projects that were never started or made because of my fear of giving them a chance.
I got a loom to share with Mardie. It's smaller than the loom I got this summer. I wanted something easy and fun and Mardie size. He has been weaving a scarf for Charmie's Christmas present and he's really enjoying it. He's doing a wonderful job too!
Charmie expressed interest in learning to crochet. We had tried two years ago and had not gotten far or had pleasant results. But this time, he really seemed to more easily grasp the process. I was also a more relaxed teacher. His first chain isn't perfect. It has areas of tension issues, twists, etc. But he stuck with it and it's impressively long.
Zuri begged to be taught to knit once she saw her brothers. From seeing how she tries when she sits on my lap, she's not ready to be turned loose with needles, but I remembered I had a spool knitter and she picked it up with little explanation.
WHO
ARE
THESE
CHILDREN???
Sitting all in a row.
Quietly working.
Asking to bring their work along to share with friends.
Making brash statements about how fun this is, how they want to do it every day, how it's more fun than video games???
All I know is that I'm no longer afraid. I'm ready to get out ALL of the tools and ALL of the yarn! I'm so happy to be able to share this with them. I hope that it lasts.
Tuesday, August 28, 2012
Week 3 Day 1 classroom reodo
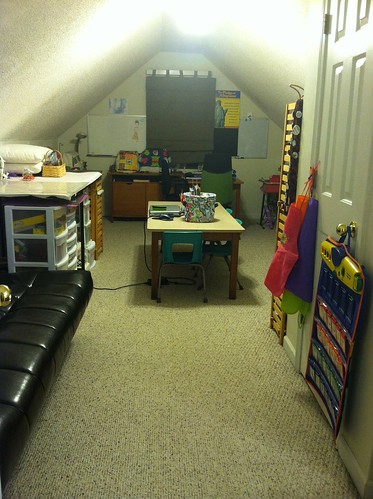
I decided to try something new in our school. Rocky had the idea to move the couch by the door, of course his suggestion was for one day when my craft goodies were no longer in the room.
I decided to try it anyway.
Lots of measurements, mental puzzle solving, pushing, pulling, heaving, hoeing, two meals and a snack, and 15 hours of Pandora later here's the result.
I have some piles downstairs "staged" for donation and resale. The throw away pile is already gone. I just have to empty the vacuum.
I like this layout because the kids are no longer facing the wall, I turned their desk 1/4 turn and now they can all look into the classroom :) I hope this won't be too distracting to them.
Also I spread out my three desks a bit more and I'm not as cramped in my sewing/working area.
An added benefit of this reorg that I wasn't counting on is that I found a lot of wasted storage.
I didn't spend anything to buy new storage solutions, but I re-purposed some poorly utilized bins, drawers, totes, etc. and now things fit better. I also followed a major rule of decluttering and organizing a space and consolidated like things and pulled out things we don't use, or no longer work.
I think the room feels more open now . Instead of coming in and having to wade through my sewing area and desk you are come to a relaxing couch/reading area. Then as you progress into the room it has more things. It also widens though so the additional items are balanced out so that's not what hits you when you come in the door.
I now have more motivation to keep my area tidy, there's no way to hide a mess.
I hope that this reorg provides a better working space for us all.
Optimally this would just be our school and the craftiness would be in a dedicated craft room. I think in lieu of that option, this one works well.
If you would like to see photos of our school from other angles, check out my flickr photostream.
Monday, August 06, 2012
My Baby is Clean

We have had a busy summer with over 25 days of traveling through 7 states while camping in JayJay. At the end of our journeys, the final day of Higher Ground, Zuri got baptized. She's been asking for a little while to do it, and the time was right! Praise God, for he is worthy of all praise!

Wednesday, June 06, 2012
Time for a bit of a change

I've been carrying and loving Tom BIhn Little Swift's in Hemp and Cork as my purse like object for a year and a half, and I haven't fallen out of love. I did yearn for a bit of a change. I wanted something fun, cute, and feminine. TB didn't have anything in their lineup that matched my criteria so I went on a search with relatively high standards and specific requirements.
I found Maruca Design a small company based in Boulder CO. All bag components from the zippers to the fabrics are made in the USA. The fabrics are even custom milled for MD twice a year in the USA. The bags are produced by hand until the fabric is gone and the following run is with different fabrics corresponding to either the spring/summer or fall/winter release. Yet they have enough features and design elements to feel couture vs. craft fair.
I found this one on eBay. It's from the spring 2006 catalog and was used. The fabrics are Ping and Bloomer's Purple. The pattern is O'Jackie which currently is redesigned.
About the only things I don't like about this bag are the black lining, absence of closures on the external pockets and the fact that it's not machine washable.
The rest of the things that I have feelings on are positive. Overall size and configuration makes both stuffing with daily needs and finding them easy. The straps are comfortable and appropriate length and width. The fabric, zipper, lining and finishing are done well and while not industrial, will last. The colors are pleasant and fun.
I will definitely keep an eye on Maruca Design for future releases of prints and patterns. Eventually I think a true minimalist bag is on my horizon.
Monday, May 21, 2012
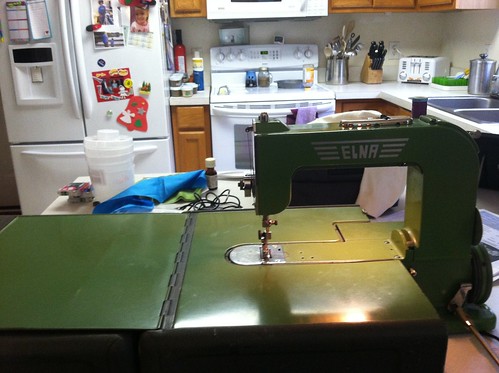
Elna Grasshopper, my little green machine
Rocky found an Elna #1 at Value Village for me. We were lucky that he found it the day before the 1/2 price sale and that the case looks innocuous. The kids and I got up early and were there when the doors opened. Little greenie was clearly being overlooked by everyone else, but I wasn't taking any chances. The herd has thinned quite a bit since I started collecting, but when he found this one, I couldn't pass it by!
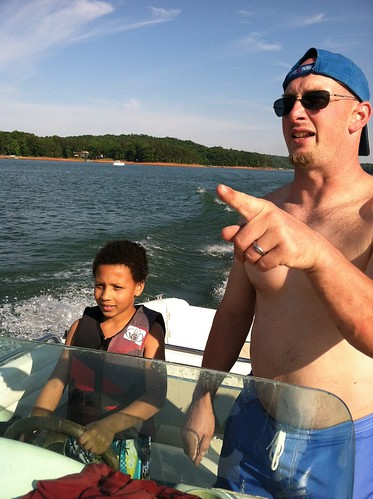
Happy 9th Birthday Captain C!
For Charmie's Birthday we spent the weekend at Lake Hartwell, SC. We all had a blast with our new family toy, more deets on our recreational blog! I think this is a birthday he will remember!
Subscribe to:
Posts (Atom)